jayrq2o1
New member
:sadbanana:
First, I'd like to start off by saying, that it should be clear from my title that I have failed. It's not so much I blew anything up, but I don't get to experience the gloriousness of higher octane fuel like the e85 users, or even race gas because I'm going to put the project on hold.
Also, as a side note (and the reason I spent four hours after work today trying to hunt down "boost leak") Bosch Platinum Iridium Fusions 4512's will fit in the Sonic/Cruze, but they're pretty useless if you don't gap them. Long story short, my dad (ASE certified tech) insisted they didn't need gapping and wouldn't let me use his feeler gauges to do it, so I just installed them, then somehow thought what was causing the erratic behavior was "boost leak" and not clearly what it was - misfiring. My pop's is a smart guy, but sometimes I forget he's also OLD.
So, anyway. this is what has discouraged me for now, but the car is fine. I'm going to let go of my dream to be first to run wmi (technically, I have run it, but w/o a fine tune due to the boost leak and the crap pump, I haven't run it with any real benefits:blankface") , but I won't let this work be in vain. I present, for your entertainment, how to "almost" run wmi on the Sonic.
, but I won't let this work be in vain. I present, for your entertainment, how to "almost" run wmi on the Sonic.
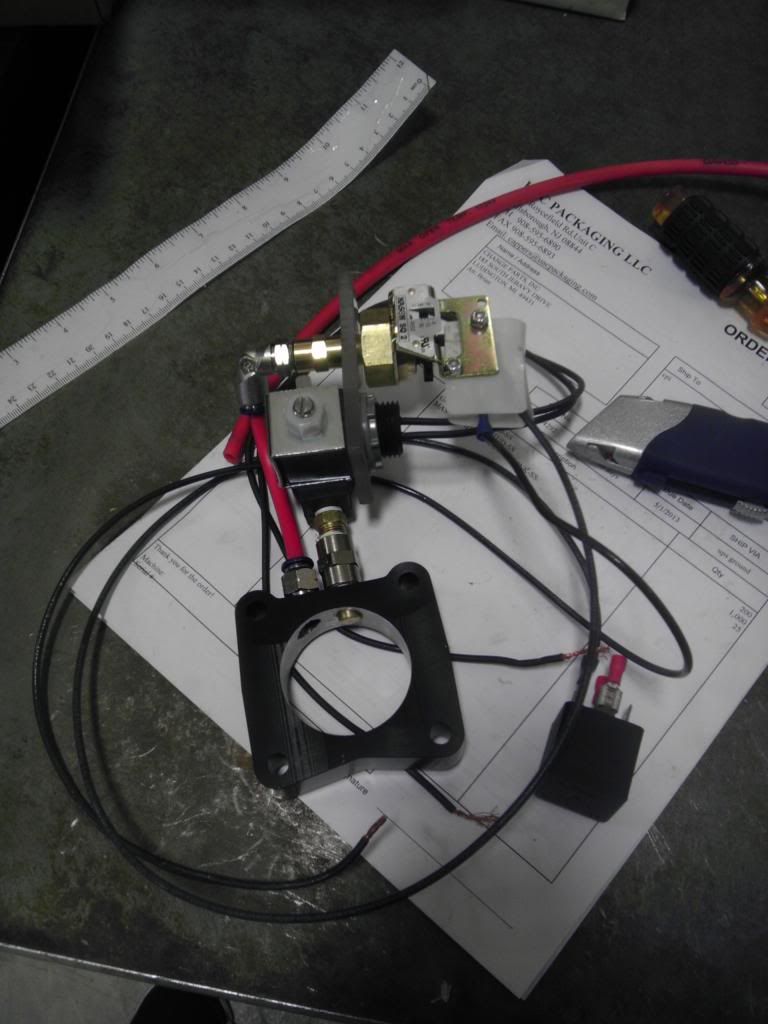
First things first, parts list.I opted to make a DIY kit because 1. Cheap and 2. Fun.
Here is what I ended up using.
McMaster Parts
DDM Parts
This isn't the exact parts list, but these are the parts that the kit obviously can't do without. There's a wiring diagram here
Well, if you're really smart, you'll just buy the Snow Performance kit, one that Jerry at BNR is possibly piecing together (I inferred it from a facebook reply to another user, I'm not solid on that, don't quote me). I'd opt for the one BNR is making since they'll likely pick just the right nozzle and pump for the 1.4t application. For my kit, it was kind of just a shot in the dark, but I guess I'm lucky I didn't hydrolock it! (or if you're really really smart, you'll just run e85).
Anywho. Where I have failed, maybe someone here can succeed. On to the pictures. This isn't the order I did it by the way. It was about a month long process of collecting and experimenting until tonight when I totally lost all drive to continue pursuing this:sadbanana:.
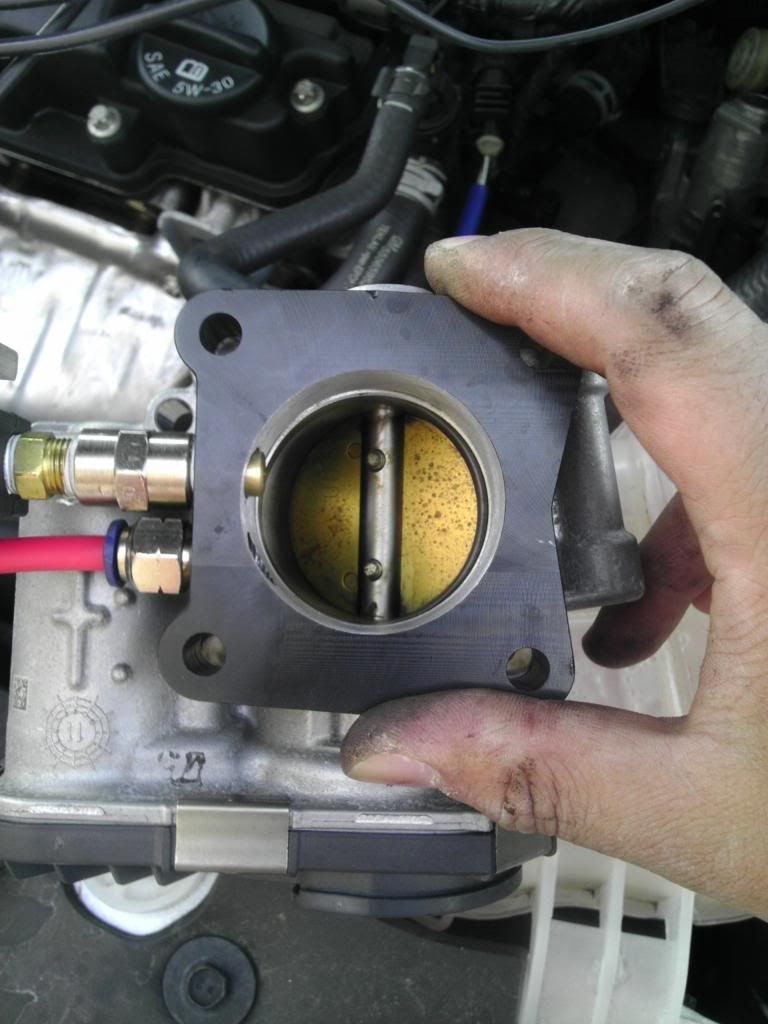
First step, Install the nozzle in the DDM Spacer. The spacer is kind of annoying to install. You might want to change the spring clamp on the water line directly below the throttle body to a smooth screw clamp. This may give you the room needed to freely install and remove the driver's side charge tube while the throttle body bolts are fully torqued. Otherwise, use the in depth spacer install I made for reference. Also, if you'd like, you can use the second 1/8 NPS thread as a boost source for activating the pressure switch.
If you're wondering if the nozzle will interfere with the throttle plate, no it will not. So, you can actually install the nozzle without worry, or machining like I did for that matter. At WOT, I'm assuming the plate is a full 180 degrees to the intake tract as any further is counter intuitive to flow.
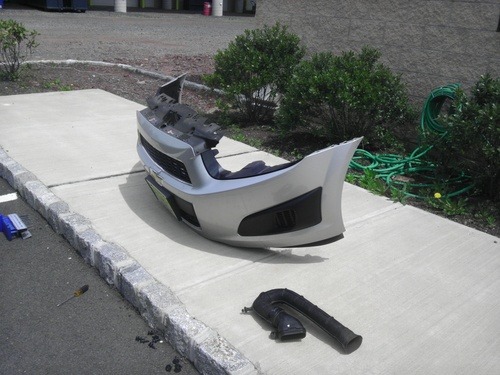
Next, remove your bumper and GM's Low Performance Saxaphone. The place it sits in the engine bay is where I basically ran the line from the pump into the engine bay, but there's plenty of room with the snorkel out of the way if you wanted to use any other route.
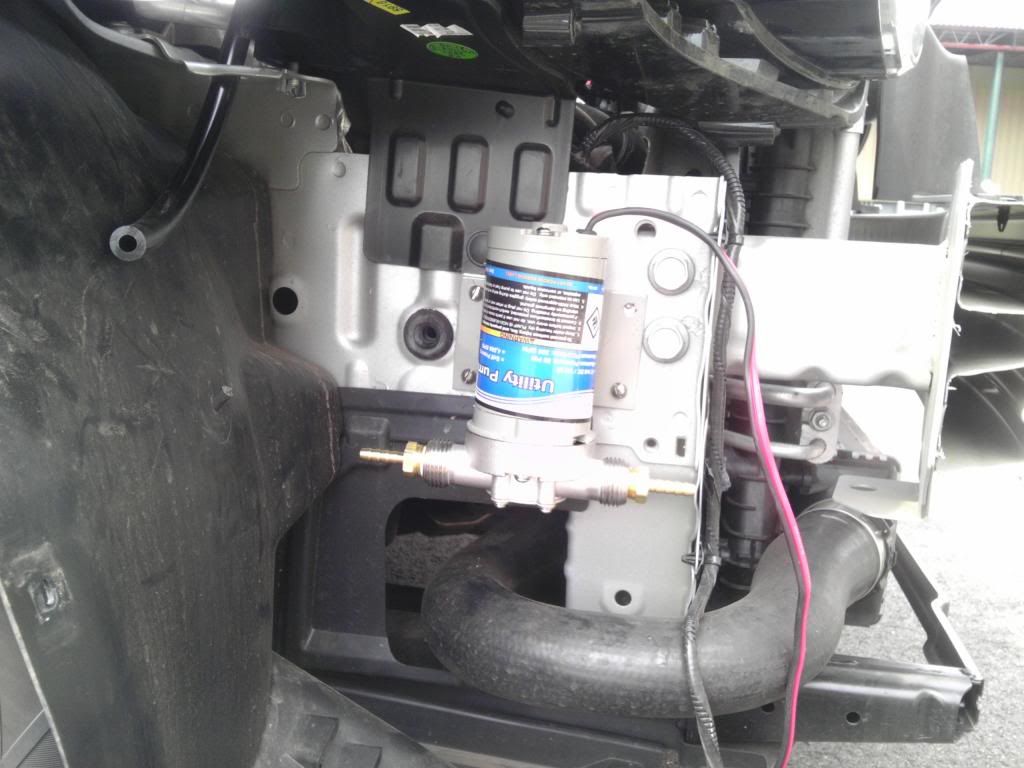
For the next part, you'll need to drill and tap the body. You can use any size you'd prefer, as long as its smaller than the mounting holes on the pump (duh). I used 10-32, but again, its up to you. Here's where we mount the pump.


I am clearly a dumbass and didn't screw or spring clamp any of my lines. None of them gave, but the one in the engine bay did, so the weekend after I did this to my car, I took the bumper off again to finally install clamps and also a bracket for holding up the Arizona Green Tea Iced Tea reservoir. Apparently my Sonic is one of those high class snobs and velcro isn't GOOD ENOUGH TO MOUNT THINGS ON IT.
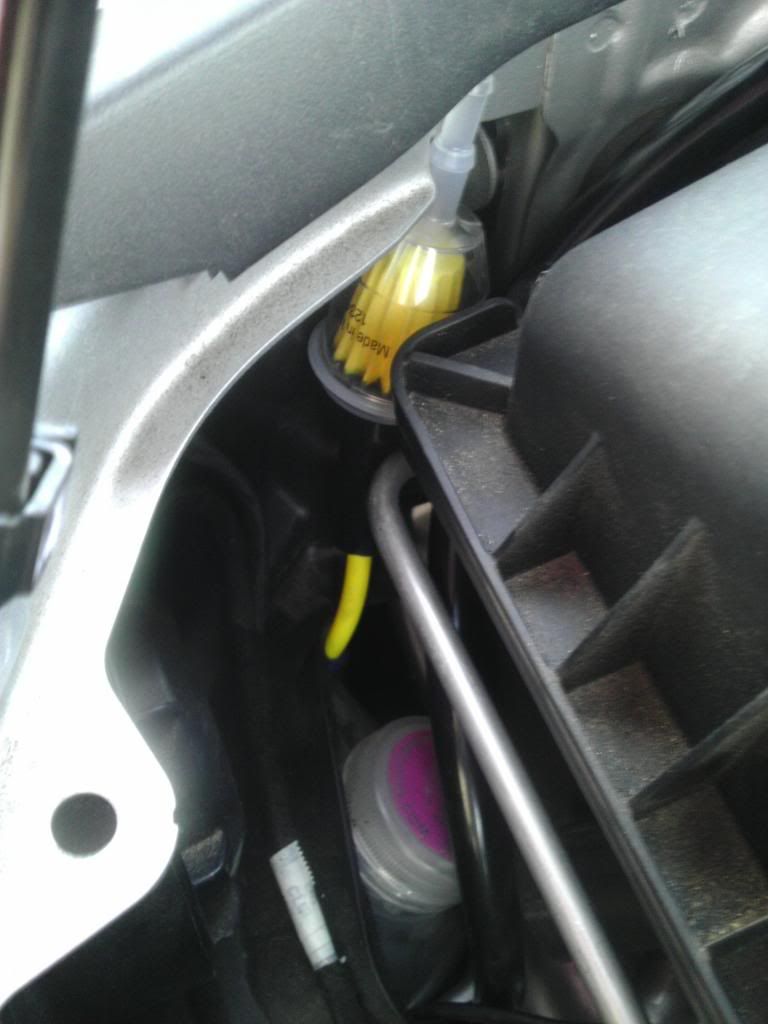
Now, how do you refill your reservoir? Why its easy. Oh yeah, don't forget to put a second hole in your Arizona gallon, or you will implode your reservoir and bukkake water meth all over the inside of your right bumper. Luckily, I stupidly put a hole in it for another reason, then added the fuel filter to keep dirt out as an after thought. The only problem with this setup is you need to move your stock air box (if you still have one like lil ole me) out of the way to refill it, but its no big deal. Some brute force and pulling and its out. MIND YOUR MAF plug. That could be a really short, but extremely depressing story if you don't.
Please forgive any grammatical errors or otherwise completely incomprehensible sentences. I spent four hours chasing a red-herring my father created and my body is sore as well as my brain.
First, I'd like to start off by saying, that it should be clear from my title that I have failed. It's not so much I blew anything up, but I don't get to experience the gloriousness of higher octane fuel like the e85 users, or even race gas because I'm going to put the project on hold.
Also, as a side note (and the reason I spent four hours after work today trying to hunt down "boost leak") Bosch Platinum Iridium Fusions 4512's will fit in the Sonic/Cruze, but they're pretty useless if you don't gap them. Long story short, my dad (ASE certified tech) insisted they didn't need gapping and wouldn't let me use his feeler gauges to do it, so I just installed them, then somehow thought what was causing the erratic behavior was "boost leak" and not clearly what it was - misfiring. My pop's is a smart guy, but sometimes I forget he's also OLD.
So, anyway. this is what has discouraged me for now, but the car is fine. I'm going to let go of my dream to be first to run wmi (technically, I have run it, but w/o a fine tune due to the boost leak and the crap pump, I haven't run it with any real benefits:blankface
, but I won't let this work be in vain. I present, for your entertainment, how to "almost" run wmi on the Sonic. First things first, parts list.I opted to make a DIY kit because 1. Cheap and 2. Fun.
Here is what I ended up using.
McMaster Parts
- 3178K63 1.90 GPH @ 40PSI misting nozzle (you'll have to put it on a lathe if you want to install it the way I did, but from the inside of the spacer should work fine)
- 7877K55 Water Solenoid
- 5116K83 1/8" npt fitting for 1/4" ID tubing
- 3460K41 Pressure Switch for activating the Relay and therefore, the pump and solenoid.
- 5231K84 10' of black pvc tubing. You might want to opt for some firmer nylon tubing. Actually, just do your own kit and just use this DIY for the pump and reservoir location.
- an old ford relay
- miscellaneous other fittings
- crappy 50 psi pump from Harbor Freight Tools
DDM Parts
- Throttle Body Spacer
This isn't the exact parts list, but these are the parts that the kit obviously can't do without. There's a wiring diagram here
Well, if you're really smart, you'll just buy the Snow Performance kit, one that Jerry at BNR is possibly piecing together (I inferred it from a facebook reply to another user, I'm not solid on that, don't quote me). I'd opt for the one BNR is making since they'll likely pick just the right nozzle and pump for the 1.4t application. For my kit, it was kind of just a shot in the dark, but I guess I'm lucky I didn't hydrolock it! (or if you're really really smart, you'll just run e85).
Anywho. Where I have failed, maybe someone here can succeed
. On to the pictures. This isn't the order I did it by the way. It was about a month long process of collecting and experimenting until tonight when I totally lost all drive to continue pursuing this:sadbanana:.First step, Install the nozzle in the DDM Spacer. The spacer is kind of annoying to install. You might want to change the spring clamp on the water line directly below the throttle body to a smooth screw clamp. This may give you the room needed to freely install and remove the driver's side charge tube while the throttle body bolts are fully torqued. Otherwise, use the in depth spacer install I made for reference. Also, if you'd like, you can use the second 1/8 NPS thread as a boost source for activating the pressure switch.
If you're wondering if the nozzle will interfere with the throttle plate, no it will not. So, you can actually install the nozzle without worry, or machining like I did for that matter. At WOT, I'm assuming the plate is a full 180 degrees to the intake tract as any further is counter intuitive to flow.
Next, remove your bumper and GM's Low Performance Saxaphone. The place it sits in the engine bay is where I basically ran the line from the pump into the engine bay, but there's plenty of room with the snorkel out of the way if you wanted to use any other route.
For the next part, you'll need to drill and tap the body. You can use any size you'd prefer, as long as its smaller than the mounting holes on the pump (duh). I used 10-32, but again, its up to you. Here's where we mount the pump.
I am clearly a dumbass and didn't screw or spring clamp any of my lines. None of them gave, but the one in the engine bay did, so the weekend after I did this to my car, I took the bumper off again to finally install clamps and also a bracket for holding up the Arizona Green Tea Iced Tea reservoir. Apparently my Sonic is one of those high class snobs and velcro isn't GOOD ENOUGH TO MOUNT THINGS ON IT.
Now, how do you refill your reservoir? Why its easy. Oh yeah, don't forget to put a second hole in your Arizona gallon, or you will implode your reservoir and bukkake water meth all over the inside of your right bumper. Luckily, I stupidly put a hole in it for another reason, then added the fuel filter to keep dirt out as an after thought. The only problem with this setup is you need to move your stock air box (if you still have one like lil ole me) out of the way to refill it, but its no big deal. Some brute force and pulling and its out. MIND YOUR MAF plug. That could be a really short, but extremely depressing story if you don't.
Please forgive any grammatical errors or otherwise completely incomprehensible sentences. I spent four hours chasing a red-herring my father created and my body is sore as well as my brain.