RockTheShazbot
New member
DISCLAIMER: I am not responsible for any damage cause to your vehicle. If you don't feel comfortable doing the DIY shown below, then take it to someone you trust to work on your vehicle.
Difficulty: Easy
Time: 10-15 minutes
You will need vinyl, spray detailer, a microfiber cloth, a fingernail (or something thin and soft that resembles a fingernail) and a razor blade.
Starting off, your car will probably dirty unless you just washed it. I am in a situation where it is too cold to wash the car and there is salt everywhere.

I personally use Mother's auto detailer, but Meguiar's is good too.

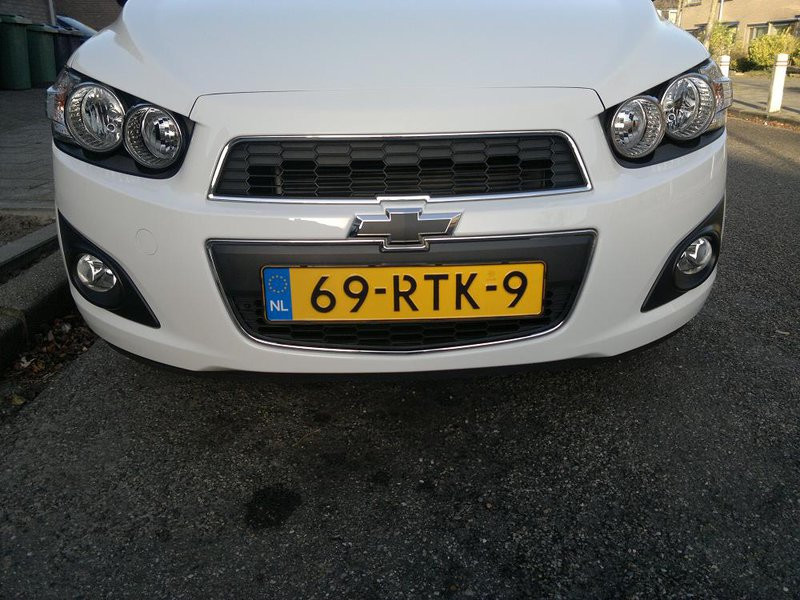
Spray the detailer onto the bowtie and surrounding area and wipe GENTLY with a microfiber cloth or similar. If you rub too hard, you could damage the paint or chrome. Since I had a lot of salt on my car at the time I did this, I flooded it and kept the cloth under where I sprayed to catch the run off, then wiped, then sprayed again and wiped again. Your logo should now be squeaky clean.

Most vinyl that I was able to find is in rolls of 15 inches wide and you buy it by the foot. I bought two feet since it is better to have too much than not enough. Also if you screw up, you got extra.
Cut out a square that is big enough to cover the entire bowtie.

Remove backing from vinyl and stick onto the logo slowly as to not cause air bubbles or creasing. I found it best to start on one side and work my way to the other, pushing down against the bowtie along the way.

For this part, I thought about just taking the razor right away but thought I might damage the chrome around the logo. Instead, I took my fingernail to make the small gap between the bowtie inlay and the chrome to make it more visible, then SLOWLY took the razor along the same edge. It should now look like this.

After you cut the edge, SLOWLY peel away the excess. I found it best to hold down the edge on the logo while I pulled the excess so that the corners of the bowtie inlay could just break away and not pull off the inlay vinyl.

After removing the excess, run your fingernail or whatever tool you used along the edge again to get rid of any fraying that might have occured. The end result will look like this, so long as you used black

Obviously you can use any color you want. I ordered my vinyl from Amazon, but there are tons of places you can buy bulk vinyl from.
Difficulty: Easy
Time: 10-15 minutes
You will need vinyl, spray detailer, a microfiber cloth, a fingernail (or something thin and soft that resembles a fingernail) and a razor blade.
Starting off, your car will probably dirty unless you just washed it. I am in a situation where it is too cold to wash the car and there is salt everywhere.

I personally use Mother's auto detailer, but Meguiar's is good too.

Spray the detailer onto the bowtie and surrounding area and wipe GENTLY with a microfiber cloth or similar. If you rub too hard, you could damage the paint or chrome. Since I had a lot of salt on my car at the time I did this, I flooded it and kept the cloth under where I sprayed to catch the run off, then wiped, then sprayed again and wiped again. Your logo should now be squeaky clean.

Most vinyl that I was able to find is in rolls of 15 inches wide and you buy it by the foot. I bought two feet since it is better to have too much than not enough. Also if you screw up, you got extra.
Cut out a square that is big enough to cover the entire bowtie.

Remove backing from vinyl and stick onto the logo slowly as to not cause air bubbles or creasing. I found it best to start on one side and work my way to the other, pushing down against the bowtie along the way.

For this part, I thought about just taking the razor right away but thought I might damage the chrome around the logo. Instead, I took my fingernail to make the small gap between the bowtie inlay and the chrome to make it more visible, then SLOWLY took the razor along the same edge. It should now look like this.

After you cut the edge, SLOWLY peel away the excess. I found it best to hold down the edge on the logo while I pulled the excess so that the corners of the bowtie inlay could just break away and not pull off the inlay vinyl.

After removing the excess, run your fingernail or whatever tool you used along the edge again to get rid of any fraying that might have occured. The end result will look like this, so long as you used black

Obviously you can use any color you want. I ordered my vinyl from Amazon, but there are tons of places you can buy bulk vinyl from.


